Wix
Add a popup to your Wix site with one piece of custom code
Wix lets you add your own code to every page from the site dashboard. PopupGenius uses that: you paste one script tag once, then design and change the popup in the PopupGenius editor, by describing it or starting from a template. Nothing is added to your Wix editor canvas.
- Pasted once under Settings > Custom Code
- Built in your site’s colors and fonts
- Email capture, discount codes and product links
Free plan: one popup, 500 views and 20 AI credits a month, with a small “Powered by PopupGenius” link. No card, and it does not expire.
How to add the popup to Wix
What Wix needs first
Wix’s custom code article asks for two things before you begin: the site must be published, and it must have a connected domain.
On Wix, connecting your own domain needs a paid site plan (a Premium or Studio plan) as well as the domain itself. So a site that still runs on its free Wix address cannot use custom code yet.
Wix’s article is written for sites built in the Wix Editor.
-
1 Create a free PopupGenius account
Sign up at app.popupgenius.app with your name, email and a password, then click “Verify email” in the email you receive. The free plan is already on the account, no card.
-
2 Save your site address and copy the script tag
On the “Site” page, enter your website address under “1. Your website” and click Save. “2. Install the code” then shows your script tag. Click “Copy script”. You can type just example.com: https:// is added for you. Your tag looks like this, with your own site key in place of YOUR-SITE-KEY:
<script async src="https://cdn.popupgenius.app/p/YOUR-SITE-KEY.js"></script>The tag stays the same when you edit or publish popups, so you paste it once.
-
3 Paste it into Wix
PopupGenius asks for the tag just before the closing </body> tag, on every page where a popup may appear. In Wix:
Site-wide, from the dashboard
The way Wix documents it, and the one to use: the tag goes on every page, including pages you add later.
- In your site’s dashboard, open Settings and click Custom Code in the Development & integrations section.
- Click + Add Custom Code at the top right.
- Paste the PopupGenius script tag and give it a name you will recognise, such as PopupGenius.
- Under Add Code to Pages, choose All pages, and load the code on each page your visitor opens.
- Under Place Code in, choose Body - end.
- Click Apply.
Wix also offers specific pages only. You do not need it: choosing where the popup shows is a setting on the popup (URL rules), so keep the tag on all pages and decide there.
-
4 Check the installation
Under “3. Check the installation”, click “Open my site”. Back on the “Site” page, the status at the top changes to “Installed on” your address after that first visit. If it keeps saying “Waiting for the code to load”, the page you opened must be on the address you saved (www or not, but the same https and the same subdomain), and the tag must be on that page.
-
5 Create and publish a popup
On “Popups”, click “Create popup”, start from a template or describe it to the AI Designer, choose its trigger on the “Workflow” tab, and click “Publish”. A checklist at the top of “Popups” ticks off each step until your first popup is live.
The Wix steps follow Wix’s own help articles, read on . Menus move, so check there if a label has changed: Wix Help Center: Embedding Custom Code on Your Site · Wix Help Center: Purchasing a Domain vs. Purchasing a Site Plan
Register the domain your visitors use
A PopupGenius account has one website address, and popups load only on pages of that address. On Wix, that is your connected domain, the one custom code runs on. The www and non-www forms count as the same site, so example.com also covers www.example.com.
When you save the address, PopupGenius reads the colors and fonts of its home page, and the AI Designer starts from them. That is why the first draft already looks like your Wix site.
What you can build for a Wix site
Start from a template or describe the popup, then change it by typing: the wording, the colors, a countdown, a second step. On Wix the usual jobs are a newsletter signup with a welcome code, a product or booking link someone sees before they leave, and a time-limited offer.
Signups are listed on the “Leads” page in PopupGenius, with the page and traffic source each came from. Download them as a CSV file to import into the tool you send email from, or send each new one there by webhook through Zapier or Make.
On a Wix store
PopupGenius cannot see or change a Wix cart. A product in the popup shows the image, price and badge you enter, and its button opens the product page, where the shopper buys as usual. The popup does not add to the cart, its price is display only, and purchases are not counted: the numbers are views, emails captured and clicks.
Adding to the cart, charging the popup’s price at checkout, purchase numbers and cart conditions are features of the PopupGenius Shopify app only.
What a popup can do on Wix
Wix runs PopupGenius as a website account. The editor, the templates and the AI Designer are the same as in the Shopify app; what differs is everything that needs a store’s cart.
Works on Wix
- An email signup form, with an optional first name and phone, that shows your discount code after signup
- Every signup on the “Leads” page with the page and traffic source it came from, as a CSV download or sent to Zapier, Make or your CRM by webhook
- Products with your image, price and badge, whose button opens the product page you entered
- Exit intent, timer, scroll and custom-event triggers
- Countdowns, show-once rules, a teaser bubble, and where it shows set by URL rules and device
- Multi-step flows, A/B variants and translations on paid plans
- Views, emails captured and clicks on the “Analytics” page
Only in the Shopify app
- The popup button adding the product to the cart
- Checkout charging the price the popup showed
- Purchase and revenue numbers
- Conditions on the cart (cart total, a product in the cart)
Running a Shopify store? See the Shopify app.
Popups at add to cart and checkout on Wix
Exit intent, timer, scroll and custom events work as soon as the tag is on the page. The “Add to cart” and “Start checkout” triggers need one more step, because PopupGenius cannot see your cart: tell it what those moments look like under “Advanced: cart and checkout detection” on the “Site” page. Until you do, the editor hides those two triggers.
- Request pattern
- Part of the address your site calls when a product is added. The popup opens only after a successful add.
- Add to cart button selector
- A CSS selector for your add to cart buttons. The popup opens on the click, before the add completes.
- Cart page path
- The path of your cart page. The popup opens when a shopper arrives there.
- Checkout button selector
- A CSS selector for your checkout buttons. The popup opens on the first click; when it closes, checkout continues.
For “Cart page path”, open your cart and copy the path from the address bar. For “Checkout button selector” or “Add to cart button selector”, right-click the button, choose Inspect, and use a class or attribute the button carries.
Popup templates for your Wix site
Six of the templates in the PopupGenius gallery. Apply one, then change the words, colors and offer by typing.
-
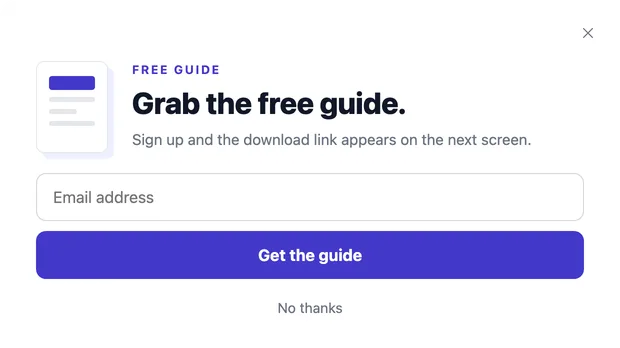
Collect emails
Lead Magnet
Offers a free guide for an email address, then shows the download link.
-
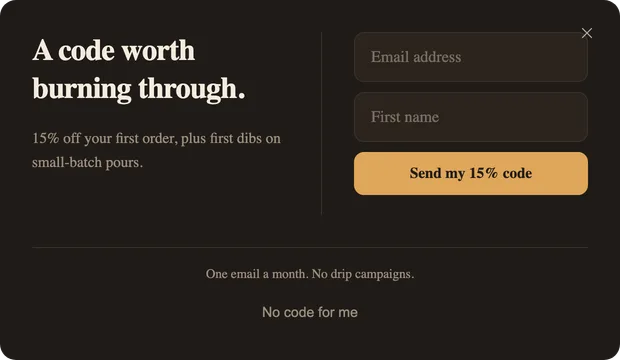
Trade a code for an email
First Flame — Code Reveal
Asks for an email and a first name, then shows the discount code.
-
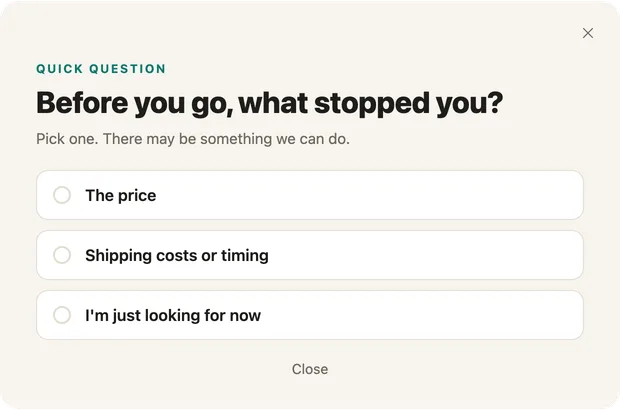
Catch someone leaving
Exit Survey
Asks what stopped them. On a paid plan each answer opens its own next screen.
-
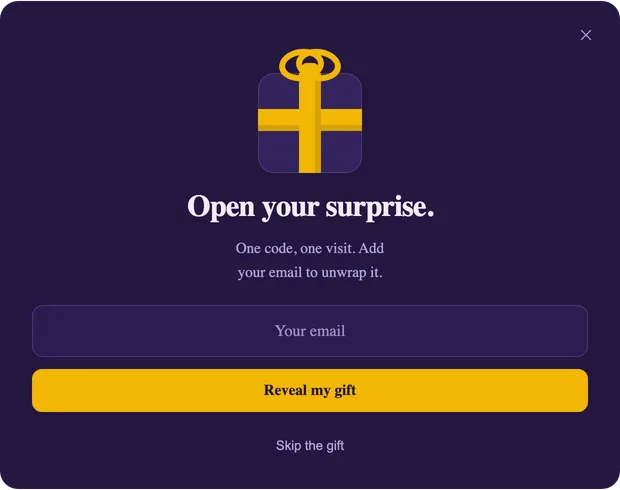
Make it a game
Mystery Gift
A wrapped gift that opens to a code once the visitor leaves an email address.
-
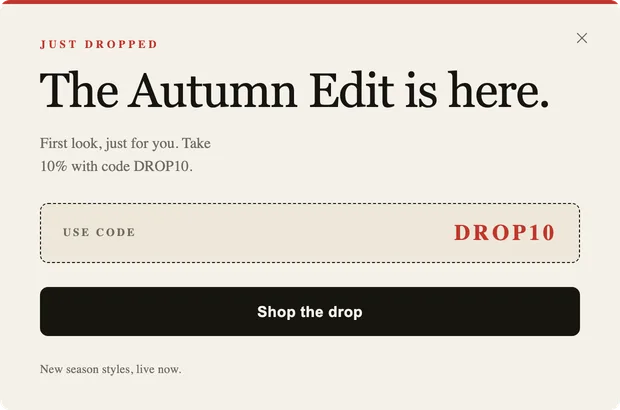
Announce something
The Drop
A new collection, a code to copy, and a button to the page it is on.
-
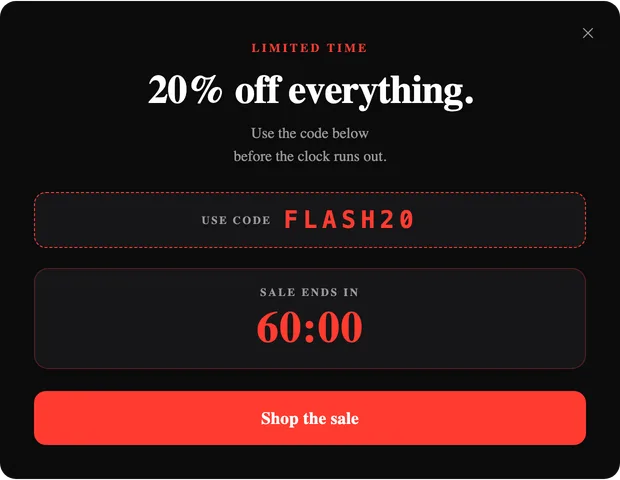
Run a sale
Flash Hour
A sale code and a countdown to the end of the offer, with one button to shop.
Start free, pay when the popup has a job
The free plan is not a trial that runs out. It stays free, with one popup and a small badge on it.
Free
$0.00/mo
1 popup with 1 step, 20 AI credits and 500 popup views a month, with a small PopupGenius badge on the popup. Upgrade when you need more.
Starter
$9.99/mo
7-day free trial- 5,000 popup views a month
- 100 AI credits a month
- Unlimited popups and steps
- No PopupGenius badge
Growth
$19.99/mo
7-day free trial- 25,000 popup views a month
- 300 AI credits a month
- Unlimited popups and steps
- No PopupGenius badge
Pro
$39.99/mo
7-day free trial- 100,000 popup views a month
- 900 AI credits a month
- Unlimited popups and steps
- No PopupGenius badge
Every paid plan includes unlimited popups, unlimited steps and A/B variants, translations, and no PopupGenius badge. Your first paid plan starts with a 7-day free trial. You pick one inside the app when the free plan runs out; there is nothing to choose now.
Questions about popups on Wix
- Which Wix plan do I need?
- Wix asks for a published site with a connected domain before you add custom code, and connecting a domain needs a paid Wix site plan. PopupGenius itself starts on its free plan.
- Where exactly does the code go in Wix?
- Settings > Custom Code > + Add Custom Code. Paste the tag, choose All pages and Body - end, then Apply.
- Do I have to place anything on the Wix canvas?
- No. The popup is not an element on your pages. It is designed in PopupGenius and opens over the page when its trigger fires.
- Can the popup add a product to my Wix cart?
- No. The button opens the product page you entered. Cart add and checkout prices need the Shopify app.
- How do I remove it?
- Delete the PopupGenius entry under Settings > Custom Code. The popup stops showing right away, and your leads stay in PopupGenius until you delete the account.
- Is there a free plan?
- Yes, and it does not expire: 1 popup with 1 step, 20 AI credits and 500 popup views a month, with a small PopupGenius badge on the popup. Upgrade when you need more. Paid plans start at $9.99 a month, and your first paid plan starts with a 7-day free trial.
Put your first popup on Wix
Create the account, paste the tag, describe the popup. The free plan is enough to see it working on your own site.
On another builder: WordPress · Squarespace · Webflow · Exit-intent popup · Email popup