WordPress
A WordPress popup without another plugin
PopupGenius is not a WordPress plugin. It is one script tag in your site’s footer. You design the popup in the PopupGenius editor, by describing it or starting from a template, and the tag shows it on your pages. PopupGenius stores nothing in WordPress, and a WordPress or theme update does not touch it.
- One line in the footer, no popup plugin to keep updated
- Built in your theme’s colors and fonts
- Email capture, discount codes and product links, WooCommerce included
Free plan: one popup, 500 views and 20 AI credits a month, with a small “Powered by PopupGenius” link. No card, and it does not expire.
How to add the popup to WordPress
What you need first
A self-hosted WordPress site (WordPress.org software on your own hosting) where you can either install a plugin or edit your theme. Either one is enough: you only need a way to put one line before the closing </body> tag.
On WordPress.com, whether you can add your own script or install plugins depends on your plan. Check that in your WordPress.com plan settings before you start.
-
1 Create a free PopupGenius account
Sign up at app.popupgenius.app with your name, email and a password, then click “Verify email” in the email you receive. The free plan is already on the account, no card.
-
2 Save your site address and copy the script tag
On the “Site” page, enter your website address under “1. Your website” and click Save. “2. Install the code” then shows your script tag. Click “Copy script”. You can type just example.com: https:// is added for you. Your tag looks like this, with your own site key in place of YOUR-SITE-KEY:
<script async src="https://cdn.popupgenius.app/p/YOUR-SITE-KEY.js"></script>The tag stays the same when you edit or publish popups, so you paste it once.
-
3 Paste it into WordPress
PopupGenius asks for the tag just before the closing </body> tag, on every page where a popup may appear. In WordPress there is more than one way to put it there; pick one.
With a code snippet plugin
The easiest way, and the one that survives theme changes. Works with classic and block themes.
- In WordPress, go to Plugins > Add New and install a header-and-footer code plugin, such as WPCode (listed as “WPCode – Insert Headers and Footers”).
- Open the plugin’s header and footer screen. In WPCode that is under its Code Snippets menu.
- Paste the PopupGenius script tag into the footer field and save.
- If you use a caching plugin, clear its cache so visitors get pages that carry the tag.
This plugin only holds the line of code. The popup itself, its design, triggers and leads stay in PopupGenius, so you can switch themes without losing anything.
With your theme’s own script setting
For themes that already have a field for header or footer scripts.
- Look in Appearance > Customize, or in your theme’s own options page, for a field named something like footer scripts or custom code.
- Paste the script tag into the footer field (the header field works too) and publish or save.
- Clear your caching plugin’s cache, if you use one.
The setting belongs to the theme. If you switch themes later, paste the tag again in the new one.
In the theme files, by hand
For classic themes when you would rather not add any plugin. Use a child theme.
- Go to Appearance > Theme File Editor. (With a block theme it is under Tools, and there is no footer.php: use a code snippet plugin instead.)
- Pick your child theme in “Select theme to edit” and open footer.php.
- Paste the script tag on the line just above the closing </body> tag.
- Click Update File and wait for the confirmation that the file was saved.
WordPress’s own documentation warns that editing a theme this way is lost when the theme updates, unless you use a child theme, and that the editor keeps no backup. If the editor is missing from both menus, your host or a security plugin has switched file editing off.
-
4 Check the installation
Under “3. Check the installation”, click “Open my site”. Back on the “Site” page, the status at the top changes to “Installed on” your address after that first visit. If it keeps saying “Waiting for the code to load”, the page you opened must be on the address you saved (www or not, but the same https and the same subdomain), and the tag must be on that page.
-
5 Create and publish a popup
On “Popups”, click “Create popup”, start from a template or describe it to the AI Designer, choose its trigger on the “Workflow” tab, and click “Publish”. A checklist at the top of “Popups” ticks off each step until your first popup is live.
The WordPress steps follow WordPress’s own help articles, read on . Menus move, so check there if a label has changed: WordPress.org: Appearance Theme File Editor Screen · WordPress Developer Resources: Editing Files · WordPress Developer Resources: Child Themes · WPCode on the WordPress.org plugin directory
Why a script tag instead of a WordPress popup plugin
Most people searching for a WordPress popup plugin want the popup, not one more plugin. PopupGenius keeps the WordPress side down to a single line, so there is nothing to update in the dashboard, no settings tables in your database, and nothing that depends on your PHP version.
The tag loads a small file of a few kilobytes. The popup code itself is added only after the page has finished loading, and it is the same file for every site, so a returning visitor’s browser already has it. Popup changes you publish are fetched fresh on each page load: you paste the tag once and never touch it again.
To remove it, delete the line (or the snippet). The popup is gone from the site at once, and your leads stay downloadable in PopupGenius until you delete the account.
A popup builder that starts from your theme
When you save your site address in PopupGenius, it reads the colors and fonts of your home page. The AI Designer uses them, so the first draft already looks like your theme. Start from a template or describe the popup in a sentence, then keep changing it by typing: “make the button our green”, “add a 15-minute countdown”, “shorten the heading”.
Where it shows is set in the popup, not in WordPress: all pages, or only the addresses that match a URL rule you write (your blog posts, one landing page, everything except /checkout/). Devices, how often a visitor sees it, and a small teaser bubble are settings on the popup too.
WooCommerce: what works and what does not
A WooCommerce store runs PopupGenius as a website, the same as any other WordPress site. That covers a lot of what a store uses popups for:
- A product in the popup, with its image, price and badge, whose button opens that product’s page.
- An email signup form that shows your discount code after the visitor signs up. You create the code in WooCommerce as usual; the popup only shows it.
- Countdowns, exit intent, timer and scroll triggers, and multi-step flows (paid plans).
- Every signup on the “Leads” page, with the page and traffic source it came from, as a CSV download or sent to Zapier, Make or your CRM by webhook.
- Popups that open after an add to cart or when a shopper heads to checkout, once you tell PopupGenius what those moments look like on your store (see below).
What stays Shopify-only, said plainly
PopupGenius cannot see or change a WooCommerce cart. So on WooCommerce the popup button does not add the product to the cart, the price in the popup is display only and is not what checkout charges, and purchases and revenue are not counted: the numbers are views, emails captured and clicks. Cart conditions (show only above a cart total, or when a product is in the cart) are not checked either.
Those features exist only in the PopupGenius Shopify app, because Shopify gives an app access to the cart and to discounts. If your store runs on Shopify, use the app instead of a script tag.
What a popup can do on WordPress
WordPress runs PopupGenius as a website account. The editor, the templates and the AI Designer are the same as in the Shopify app; what differs is everything that needs a store’s cart.
Works on WordPress
- An email signup form, with an optional first name and phone, that shows your discount code after signup
- Every signup on the “Leads” page with the page and traffic source it came from, as a CSV download or sent to Zapier, Make or your CRM by webhook
- Products with your image, price and badge, whose button opens the product page you entered
- Exit intent, timer, scroll and custom-event triggers
- Countdowns, show-once rules, a teaser bubble, and where it shows set by URL rules and device
- Multi-step flows, A/B variants and translations on paid plans
- Views, emails captured and clicks on the “Analytics” page
Only in the Shopify app
- The popup button adding the product to the cart
- Checkout charging the price the popup showed
- Purchase and revenue numbers
- Conditions on the cart (cart total, a product in the cart)
Running a Shopify store? See the Shopify app.
Popups at add to cart and checkout on WordPress
Exit intent, timer, scroll and custom events work as soon as the tag is on the page. The “Add to cart” and “Start checkout” triggers need one more step, because PopupGenius cannot see your cart: tell it what those moments look like under “Advanced: cart and checkout detection” on the “Site” page. Until you do, the editor hides those two triggers.
- Request pattern
- Part of the address your site calls when a product is added. The popup opens only after a successful add.
- Add to cart button selector
- A CSS selector for your add to cart buttons. The popup opens on the click, before the add completes.
- Cart page path
- The path of your cart page. The popup opens when a shopper arrives there.
- Checkout button selector
- A CSS selector for your checkout buttons. The popup opens on the first click; when it closes, checkout continues.
On WooCommerce, the “Request pattern” field’s own example is wc-ajax=add_to_cart: the request WooCommerce makes when a product is added without the page reloading. If your product page reloads when adding, open your browser’s developer tools (Network tab) once to see what it calls. For “Cart page path”, use the address your cart page opens at, for example /cart/.
Popup templates for your WordPress site
Six of the templates in the PopupGenius gallery. Apply one, then change the words, colors and offer by typing.
-

Collect emails
Lead Magnet
Offers a free guide for an email address, then shows the download link.
-
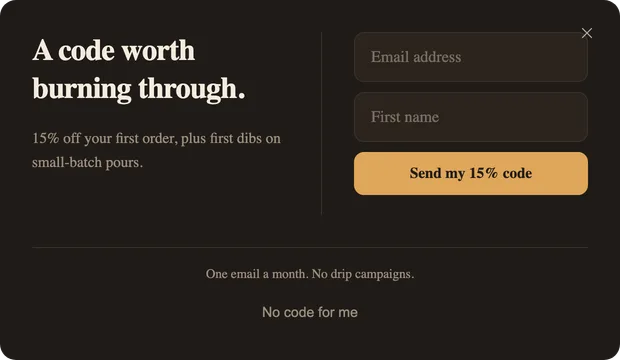
Trade a code for an email
First Flame — Code Reveal
Asks for an email and a first name, then shows the discount code.
-
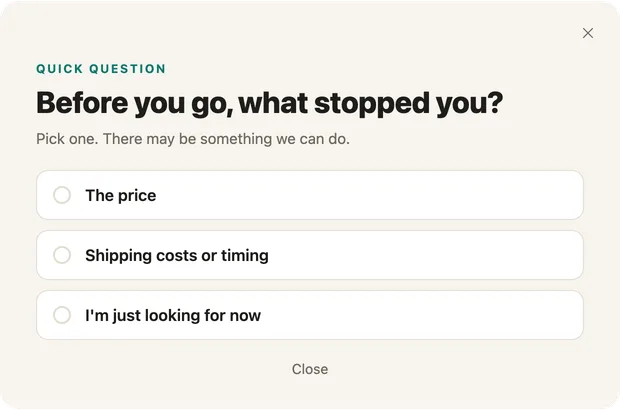
Catch someone leaving
Exit Survey
Asks what stopped them. On a paid plan each answer opens its own next screen.
-
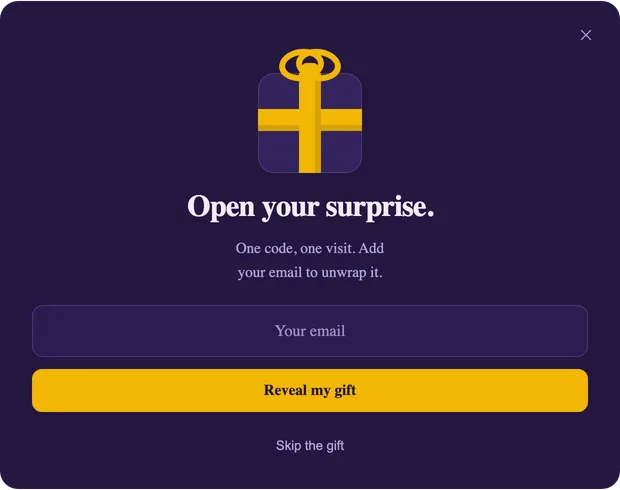
Make it a game
Mystery Gift
A wrapped gift that opens to a code once the visitor leaves an email address.
-
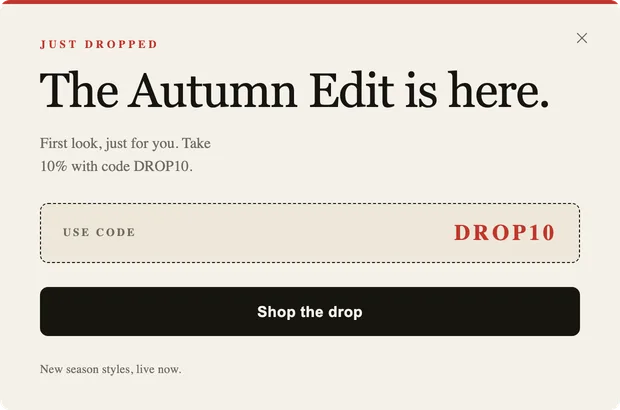
Announce something
The Drop
A new collection, a code to copy, and a button to the page it is on.
-
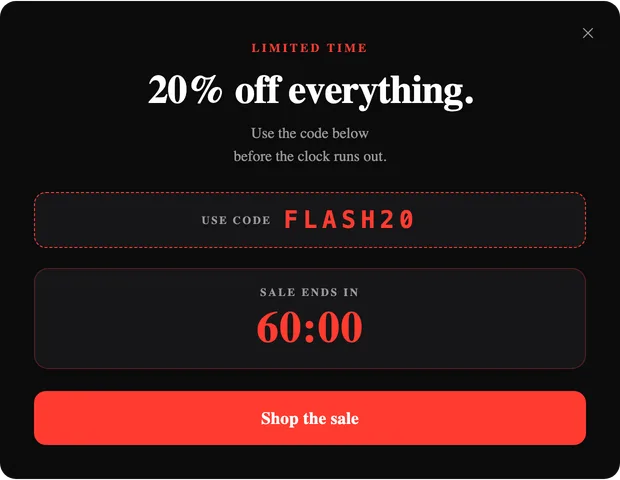
Run a sale
Flash Hour
A sale code and a countdown to the end of the offer, with one button to shop.
Start free, pay when the popup has a job
The free plan is not a trial that runs out. It stays free, with one popup and a small badge on it.
Free
$0.00/mo
1 popup with 1 step, 20 AI credits and 500 popup views a month, with a small PopupGenius badge on the popup. Upgrade when you need more.
Starter
$9.99/mo
7-day free trial- 5,000 popup views a month
- 100 AI credits a month
- Unlimited popups and steps
- No PopupGenius badge
Growth
$19.99/mo
7-day free trial- 25,000 popup views a month
- 300 AI credits a month
- Unlimited popups and steps
- No PopupGenius badge
Pro
$39.99/mo
7-day free trial- 100,000 popup views a month
- 900 AI credits a month
- Unlimited popups and steps
- No PopupGenius badge
Every paid plan includes unlimited popups, unlimited steps and A/B variants, translations, and no PopupGenius badge. Your first paid plan starts with a 7-day free trial. You pick one inside the app when the free plan runs out; there is nothing to choose now.
Questions about popups on WordPress
- Do I need a WordPress popup plugin at all?
- No popup plugin. You need a way to put one script tag in your footer: a code snippet plugin, your theme’s script setting, or footer.php in a child theme. The popup is built and stored in PopupGenius.
- Can I add a popup to WordPress without any plugin?
- Yes. Paste the tag into your theme’s footer script setting, or into footer.php of a child theme just above </body>. Both put it on every page without installing anything.
- Does it work with block themes and page builders?
- Yes. The tag only needs to be on the page, whatever built the page. With a block theme there is no footer.php to edit, so use a code snippet plugin for the footer.
- Can the popup add a product to the WooCommerce cart?
- No. On WooCommerce the product button opens the product page, where the shopper adds it as usual. Adding to the cart and charging the popup’s price at checkout are Shopify-only.
- Will it slow down my WordPress site?
- The tag loads a file of a few kilobytes, and PopupGenius starts only after your page has finished loading, so it does not hold up the page your visitor is waiting for.
- Does it work on my staging site?
- Popups load only on the website address you register, with or without www. A staging copy on another subdomain is a different address, and each account has one.
- Is there a free plan?
- Yes, and it does not expire: 1 popup with 1 step, 20 AI credits and 500 popup views a month, with a small PopupGenius badge on the popup. Upgrade when you need more. Paid plans start at $9.99 a month, and your first paid plan starts with a 7-day free trial.
Put your first popup on WordPress
Create the account, paste the tag, describe the popup. The free plan is enough to see it working on your own site.
On another builder: Wix · Squarespace · Webflow · Exit-intent popup · Email popup